Honeywell Humidifier Instructions: A Comprehensive Guide
Congratulations on selecting a Honeywell humidifier! This guide provides essential instructions for optimal performance‚ ensuring family comfort and home protection through proper operation.
Understanding Your Honeywell Humidifier
Honeywell humidifiers enhance family health and safeguard your home by maintaining optimal humidity levels. These units operate on evaporative principles‚ adding moisture until the air reaches its capacity‚ influenced by temperature and room size.
Proper placement is crucial; position the humidifier on a firm‚ waterproof surface‚ at least three feet from beds and twelve inches from walls‚ ensuring stability and safety‚ especially around children and pets.
Regular monitoring with a device like the Honeywell HHM10 helps prevent condensation and stains in closed rooms.
Safety Precautions
Always place your Honeywell humidifier on a firm‚ flat‚ waterproof surface‚ a minimum of three feet from bedside locations. Maintain at least twelve inches of clearance from walls to prevent moisture damage.
Keep the unit out of reach of children and pets to avoid accidental tipping or injury. Ensure the power cord remains away from heated surfaces and is positioned to prevent tripping hazards.
Utilize only a 120V AC power source and adhere to local electrical codes for safe operation.
Placement and Stability
Ensure your Honeywell humidifier rests on a stable‚ level‚ and waterproof surface. A minimum distance of three feet (1.2m) from the bedside is crucial for comfortable sleep and safety. Maintain a clearance of twelve inches (30cm) from walls to prevent potential moisture buildup and damage.
Prioritize a location inaccessible to children and pets‚ minimizing the risk of accidental tipping or contact with water. Regularly check the unit’s stability‚ confirming the power cord is secure and free from obstructions.
Electrical Safety (120V AC)
Always ensure your Honeywell humidifier is connected to a grounded 120V AC electrical outlet. Never operate the unit with a damaged cord or plug; immediate replacement is essential. Avoid using extension cords‚ as they can pose a safety hazard and may not be rated for the humidifier’s power requirements.
Keep the power cord away from heated surfaces and areas where it could be tripped over or damaged. Disconnect the humidifier from the power source before cleaning‚ filling‚ or performing any maintenance.
Humidifier Components & Accessories

Your Honeywell humidifier includes essential components for effective operation. Refer to Table 1 (if available in your manual) for a detailed list of included accessories. Familiarize yourself with each part‚ understanding its function within the system.
For disassembly‚ consult Fig. 4 (if provided) to safely access internal components for cleaning or maintenance. Proper understanding of these parts ensures efficient performance and longevity of your humidifier. Always handle components with care to avoid damage.
Included Accessories (Refer to Table 1 ⏤ if available in manual)
Carefully unpack your Honeywell humidifier and verify all components are present. Table 1‚ if included within your specific model’s manual‚ details each accessory. This typically includes the humidifier base‚ water tank‚ and potentially a filter or wick.

Confirm you have received all listed items before proceeding. Missing parts may affect functionality. Retain the packaging and manual for future reference‚ especially regarding warranty information. Proper inventory ensures a smooth setup process.
Disassembly (Refer to Fig. 4 ー if available in manual)

For maintenance and cleaning‚ occasional disassembly is required. Refer to Figure 4 in your manual for a detailed visual guide. Typically‚ this involves removing the water tank and accessing the internal components.
Handle parts with care to avoid damage. Note the placement of each component during disassembly to ensure correct reassembly. Disassembly facilitates thorough cleaning and filter replacement‚ maintaining optimal humidifier performance and hygiene. Always unplug the unit before disassembling.
Setting Up Your Honeywell Humidifier
Initial setup is straightforward. Place the humidifier on a firm‚ flat‚ waterproof surface‚ at least three feet from your bed and twelve inches from walls. Ensure stability and keep it out of reach of children and pets.
Fill the water tank with clean‚ cool water. To power on‚ plug the unit into a 120V AC outlet. Basic operation involves selecting a desired humidity level or output setting‚ allowing the humidifier to begin adding moisture to the air.
Initial Setup and Filling the Water Tank
Begin by carefully unpacking your Honeywell humidifier and placing it on a stable‚ waterproof surface. Ensure at least three feet of clearance from bedding and twelve inches from walls.
To fill the water tank‚ detach it following the disassembly instructions (refer to Fig. 4). Fill with cool‚ clean water only. Avoid using additives. Reattach the tank securely before operation. Proper tank seating is crucial to prevent leaks during use.
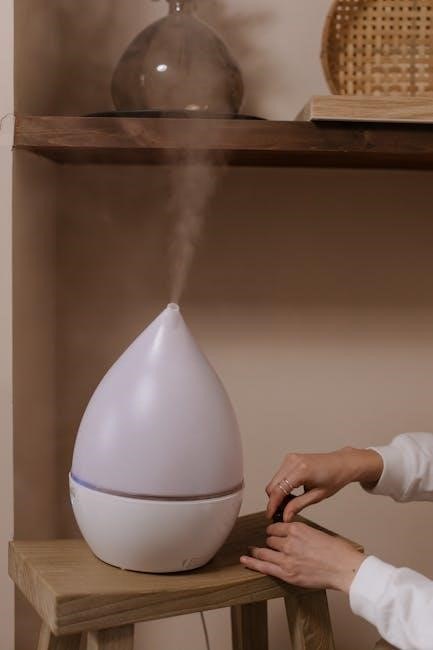
Powering On and Basic Operation
Connect the humidifier to a 120V AC electrical outlet‚ ensuring the cord is safely positioned away from heat sources. Once the water tank is securely in place‚ power on the unit using the designated power button.
Initial operation will involve selecting a desired humidity level. The humidifier will begin adding moisture to the air‚ adjusting output based on room conditions. Monitor the unit for proper function and listen for normal operating sounds.
Adjusting Humidity Levels
Optimal humidity significantly impacts comfort and health. Understanding relative humidity is key; drier air requires more moisture addition. Honeywell humidifiers respond to ambient conditions‚ adjusting output accordingly.
Utilize a humidity monitor‚ such as the Honeywell HHM10‚ for precise readings. Avoid excessive humidity‚ which can cause condensation. The humidifier cannot add more moisture than the air can hold‚ influenced by temperature and room size.
Understanding Relative Humidity
Relative humidity represents the amount of moisture in the air compared to its maximum capacity at a given temperature. Warmer air holds more moisture. A Honeywell humidifier adds moisture‚ but its effectiveness depends on existing conditions.
The drier the air‚ the more moisture the humidifier will introduce. However‚ it cannot surpass the air’s holding capacity. Monitoring humidity levels is crucial to prevent over-humidification and potential condensation issues within your home environment.
Using a Humidity Monitor (e.g.‚ Honeywell HHM10)
Accurate humidity monitoring is vital for optimal comfort and preventing issues like condensation. Devices like the Honeywell HHM10 provide precise readings‚ allowing you to adjust your humidifier accordingly.
Regularly check humidity levels‚ especially in closed or small rooms. If you notice moisture on windows‚ reduce humidifier output. Maintaining ideal humidity—typically between 30-50%—promotes health and protects your home from potential damage caused by excessive moisture buildup.
Maintenance and Cleaning
Regular maintenance ensures your Honeywell humidifier operates efficiently and hygienically. Establish a cleaning schedule to prevent mineral buildup and bacterial growth.
Prioritize frequent water tank cleaning to avoid scale and discoloration. If your model has a filter‚ replace it as recommended in the manual. Consistent cleaning extends the humidifier’s lifespan and maintains optimal air quality‚ contributing to a healthier home environment for you and your family.
Regular Cleaning Schedule
Establish a routine for optimal performance. Empty and thoroughly dry the water tank daily to prevent stagnation. Weekly‚ disinfect the tank with a mild bleach solution (follow manual instructions carefully!).
Monthly‚ clean the humidifier base and any removable parts. Inspect and clean the transducer (ultrasonic models) regularly. Adhering to this schedule minimizes mineral buildup‚ inhibits bacterial growth‚ and ensures consistently clean‚ healthy humidified air for your family’s well-being.
Water Tank Cleaning Procedures
Begin by emptying any remaining water. Fill the tank with a solution of white vinegar and water (1:1 ratio) or a mild bleach solution (follow manual’s dilution guidelines!). Let it sit for at least 30 minutes‚ or longer for stubborn buildup.
Scrub the tank’s interior with a soft brush‚ then rinse thoroughly with clean water until all traces of the cleaning solution are gone. Dry completely before reassembling and refilling. Repeat weekly for best results.
Filter Replacement (if applicable)
Check your humidifier model’s manual to determine if it utilizes a filter and the recommended replacement frequency. Typically‚ filters should be replaced every 1-3 months‚ depending on water quality and usage.
Turn off and unplug the humidifier before accessing the filter. Remove the old filter and dispose of it properly. Install the new filter‚ ensuring it’s securely in place. Regular filter changes maintain optimal performance and prevent mineral buildup.
Troubleshooting Common Issues
If your humidifier isn’t turning on‚ verify the power cord is securely plugged in and the outlet is functioning. For low humidity output‚ ensure the water tank is full and the filter (if applicable) is clean.
Water leaks may indicate an improperly seated tank or damaged components; inspect these areas carefully. Remember evaporative humidifiers cannot exceed the air’s moisture capacity. Consult the manual for specific error codes or further assistance.
Humidifier Not Turning On
First‚ confirm the power cord is firmly connected to both the humidifier and a working electrical outlet. Test the outlet with another device to rule out an electrical issue. Ensure the humidifier’s power switch is in the “on” position.
If the problem persists‚ check for any tripped circuit breakers or blown fuses. Review the manual for specific reset instructions or troubleshooting steps related to power failure.
Low Humidity Output
If your Honeywell humidifier isn’t producing enough moisture‚ consider the room’s initial humidity level – drier air requires more humidification. Verify the water tank is adequately filled and properly seated. Check the filter (if applicable) for cleanliness; a dirty filter restricts airflow.
Remember‚ evaporative humidifiers are limited by the air’s capacity to hold moisture‚ influenced by temperature and room size. Use a humidity monitor to assess actual output.

Water Leaks
Discovering water leaks requires immediate attention. First‚ ensure the water tank is correctly positioned and fully seated; improper alignment is a common cause. Inspect the tank for cracks or damage‚ replacing it if necessary. Verify the humidifier is on a level‚ waterproof surface.
Additionally‚ check all connections and hoses for tightness. Consult local codes regarding proper drainage if leaks persist‚ especially with whole-house models.
Understanding Evaporative Humidification
Evaporative humidifiers function by utilizing a wick or filter to absorb water‚ then a fan blows air through it‚ causing evaporation and increasing humidity. Unlike other types‚ they naturally regulate output; drier air absorbs more moisture.
Factors like room temperature‚ size‚ and initial humidity levels significantly impact moisture output. Remember‚ an evaporative humidifier cannot exceed the air’s capacity to hold moisture‚ preventing over-humidification.
How Evaporative Humidifiers Work
Honeywell’s evaporative humidifiers employ a simple‚ effective process. Water is drawn up into a wick or filter‚ maximizing surface area for evaporation. A fan then gently moves air across this moistened surface‚ naturally adding moisture to the air.
This method self-regulates; as humidity rises‚ evaporation slows‚ preventing over-saturation. Crucially‚ they don’t create condensation or mineral dust‚ offering a clean and comfortable humidity boost for your home environment.

Factors Affecting Moisture Output (Temperature‚ Room Size)
Moisture output isn’t constant; it’s influenced by several factors. Warmer air holds more moisture‚ so a higher temperature allows for greater evaporation. Conversely‚ cooler temperatures reduce output. Room size is also critical – larger spaces require more moisture to achieve the desired humidity level.
Drier air prompts increased moisture addition‚ while already humid air slows the process. Remember‚ an evaporative humidifier can only add moisture the air can actually hold!
Ventilation and Humidity Control
Proper ventilation is crucial when using a humidifier‚ especially in closed or small rooms. Excessive humidity can lead to condensation‚ causing stains on walls and potential mold growth. Regularly check for moisture on windows as an indicator of high humidity levels.
Monitoring humidity with a device like the Honeywell HHM10 ensures optimal levels. Maintaining appropriate ventilation prevents issues and maximizes the benefits of your humidifier.
Preventing Condensation and Stains
Condensation appears when the humidifier adds more moisture than the air can hold‚ often in cooler areas. Regularly inspect windows and walls for signs of dampness. Proper ventilation is key to mitigating this issue‚ circulating air and reducing humidity buildup.
If you observe moisture‚ increase airflow or slightly lower the humidifier setting. Addressing condensation promptly prevents unsightly stains and potential damage to your home’s surfaces.
Monitoring Humidity in Closed Rooms
Closed rooms require diligent humidity monitoring to prevent over-saturation. Utilize a humidity monitor‚ such as the Honeywell HHM10‚ for accurate readings. Ideal relative humidity levels fall between 30-50% to ensure comfort and prevent mold growth.
Periodically check for condensation on windows – a clear indicator of excessive humidity. Adjust humidifier settings accordingly‚ and ensure adequate ventilation to maintain a healthy indoor environment. Consistent monitoring safeguards your home.
Warranty Information
Honeywell provides a One-Year Limited Warranty covering defects in materials and workmanship from the date of purchase. This warranty represents the sole and exclusive remedy available to the consumer.
Implied warranties‚ including merchantability and fitness for a particular purpose‚ are limited to the one-year warranty duration. Some states may have differing regulations regarding warranty limitations. Refer to the complete warranty documentation for detailed terms and conditions‚ and claim procedures.
One-Year Limited Warranty
Honeywell warrants this humidifier against defects in material and workmanship for one year from the date of purchase. During this period‚ Honeywell will‚ at its option‚ repair or replace any defective parts‚ without charge. This warranty extends only to the original purchaser.
Proof of purchase is required to obtain warranty service. This warranty does not cover damage resulting from misuse‚ abuse‚ accidents‚ or unauthorized modifications. It is the ONLY EXPRESS WARRANTY made by Honeywell.
Limitations of Implied Warranties
Any implied warranties‚ including the warranties of merchantability and fitness for a particular purpose‚ are hereby limited to the one-year duration of this express warranty. Some states do not allow limitations on how long an implied warranty lasts‚ so this limitation may not apply to you.
Honeywell’s liability for incidental or consequential damages is excluded. This warranty gives you specific legal rights‚ and you may also have other rights which vary from state to state.
Benefits of Using a Honeywell Humidifier
Welcome! Proper use of a Honeywell humidifier offers numerous benefits related to your family’s health and comfort. Maintaining optimal humidity levels can alleviate dry skin‚ soothe irritated sinuses‚ and reduce the symptoms of colds and allergies.
Beyond personal well-being‚ a humidifier helps safeguard and protect your home by preventing damage to wood floors‚ furniture‚ and wallpaper caused by excessively dry air. Enjoy a healthier‚ more comfortable living environment!
Family Health and Comfort
Honeywell humidifiers significantly enhance family well-being by combating the effects of dry air. Maintaining appropriate humidity levels can alleviate dry skin‚ chapped lips‚ and itchy eyes‚ promoting overall comfort.
Furthermore‚ humidified air can soothe irritated nasal passages and throats‚ easing symptoms associated with colds‚ flu‚ and allergies. Breathe easier and enjoy a more comfortable home environment‚ especially during dry winter months‚ contributing to a healthier lifestyle for everyone.
Protecting Your Home
Honeywell humidifiers aren’t just about personal comfort; they actively safeguard your home’s structure and belongings. Proper humidity levels help prevent wood from drying out and cracking‚ protecting furniture‚ floors‚ and musical instruments.
Maintaining consistent moisture also reduces static electricity‚ minimizing damage to sensitive electronics. By controlling humidity‚ you can prevent condensation and potential mold growth‚ preserving the integrity and value of your home for years to come.
Steam Humidifier Specific Instructions
Steam humidifiers offer a unique approach to moisture‚ but require specific attention for optimal performance. Please thoroughly read this manual and your humidity control manual to understand system operation.
Ensure proper ventilation to prevent excessive condensation. Regularly check the unit for scale buildup‚ as steam humidifiers can accumulate mineral deposits. Consistent monitoring and adherence to recommended cleaning procedures will maximize efficiency and longevity of your Honeywell steam humidifier.
Tips for Optimal Steam Humidifier Performance
To maximize your Honeywell steam humidifier’s efficiency‚ consistently use distilled water to minimize mineral buildup. Regularly inspect and clean the unit according to the manual’s guidelines‚ focusing on areas prone to scale.
Maintain proper ventilation in the room to prevent condensation. Familiarize yourself with your humidity control system’s settings for precise humidity management. Consistent monitoring and proactive maintenance will ensure years of reliable‚ comfortable performance from your steam humidifier.
Referencing the Humidity Control Manual
Your humidity control manual is crucial for understanding your system’s specific features and operation. Honeywell recommends thoroughly reviewing it to learn about settings‚ scheduling‚ and troubleshooting.
Pay close attention to instructions regarding humidity level adjustments and system compatibility. Proper understanding of the manual ensures optimal performance and prevents potential issues. It will guide you in achieving the desired humidity levels for enhanced comfort and a protected home environment.

Whole-House Humidifier Considerations

Honeywell whole-house humidifiers offer comprehensive home comfort‚ but require careful attention to proper operation. Ensure the system is correctly integrated with your existing HVAC system for efficient performance.
Regularly inspect the water supply line and drainage system to prevent leaks or blockages. Familiarize yourself with the system’s controls and settings for optimal humidity levels. Proper operation safeguards your home and maximizes the benefits of a whole-house humidification system.
Proper System Operation
Honeywell whole-house humidifiers demand consistent monitoring for peak efficiency. Regularly check the humidity control manual to understand system functionalities and settings. Ensure adequate water flow to the humidifier‚ and verify proper drainage to prevent issues.
Consistent operation‚ coupled with routine maintenance‚ extends the lifespan of your humidifier. Familiarize yourself with the system’s indicators and respond promptly to any alerts‚ guaranteeing optimal performance and a comfortable home environment.
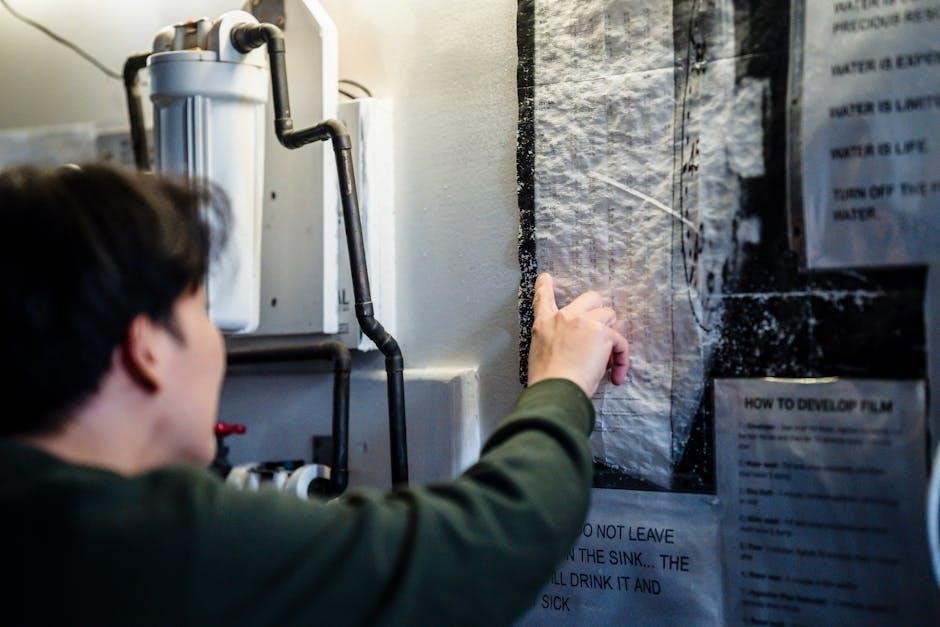
Drainage Considerations
Proper drainage is crucial for Honeywell humidifier longevity and preventing water damage. Always consult your local codes regarding drainage requirements for humidifiers‚ ensuring compliance with regulations. A functional drainage system prevents overflow and maintains optimal humidity levels.
Regularly inspect the drain line for clogs or obstructions‚ addressing them promptly. Incorrect drainage can lead to mold growth and structural issues. Prioritize a well-maintained drainage system for a healthy and efficient humidifier operation.
Consulting Local Codes for Drainage
Before installing or operating your Honeywell humidifier‚ consult local plumbing and building codes regarding drainage requirements. These codes dictate acceptable methods for disposing of excess water‚ ensuring compliance and preventing potential violations.
Regulations vary by location‚ so understanding your area’s specific rules is vital. Improper drainage can lead to fines or necessitate costly corrections. Adhering to local codes safeguards your property and ensures responsible humidifier operation. Prioritize code compliance for a worry-free experience.
Minimum Clearance Requirements
Maintaining adequate space around your Honeywell humidifier is crucial for safe and efficient operation. Ensure a minimum clearance of 15 inches (38cm) on all sides – top‚ bottom‚ front‚ and back. This prevents airflow obstruction and allows for proper ventilation.
Insufficient clearance can lead to overheating‚ reduced performance‚ and potential fire hazards. Keep the area free from obstructions like curtains‚ furniture‚ and clothing. Prioritizing these clearances ensures optimal functionality and longevity of your humidifier unit.
Maintaining 15 inches of Clearance
Adhering to the 15-inch clearance rule is paramount for Honeywell humidifier safety and performance. This space‚ surrounding all sides of the unit‚ prevents restricted airflow‚ which can cause overheating and diminish humidifying capabilities.
Regularly inspect the area around your humidifier‚ removing any encroaching items. This includes drapes‚ walls‚ furniture‚ and personal belongings. Maintaining this buffer zone safeguards against potential hazards and ensures the humidifier operates efficiently‚ delivering optimal humidity control.