KitchenAid Combination Wall Oven Manual: A Comprehensive Guide
Welcome! This guide provides essential information for your KitchenAid combination wall oven. It details safety precautions, component locations, and operational instructions for optimal performance.
Important Note: Features may vary by model; consult the included documentation or KitchenAid’s website for specifics.
Understanding Your KitchenAid Combination Oven
Your KitchenAid combination wall oven is a versatile appliance designed for both convenience and culinary precision. It seamlessly integrates a traditional oven with microwave functionality, offering a wide range of cooking options. This manual serves as a comprehensive resource to help you unlock the full potential of your oven, ensuring safe and efficient operation.
Key to successful use lies in understanding the distinct features of both the upper microwave and lower oven cavities. The combination design allows for simultaneous cooking, saving valuable time in the kitchen. However, it’s crucial to familiarize yourself with the specific controls and settings for each cavity to achieve desired results.
This guide will walk you through identifying model-specific components, navigating the electronic control panel, and utilizing features like CleanBake™ and EasyConvect™. Remember that variations exist between models, so referencing your oven’s specific documentation is always recommended. Prioritize safety by carefully reviewing the important safety instructions before initial use.
Model Identification and Location of Key Features
Identifying your specific KitchenAid model is the first step to understanding its unique features. The model and serial number plate is conveniently located on the bottom edge of the control panel, on the right-hand side. This information is crucial for accessing specific support resources and replacement parts.
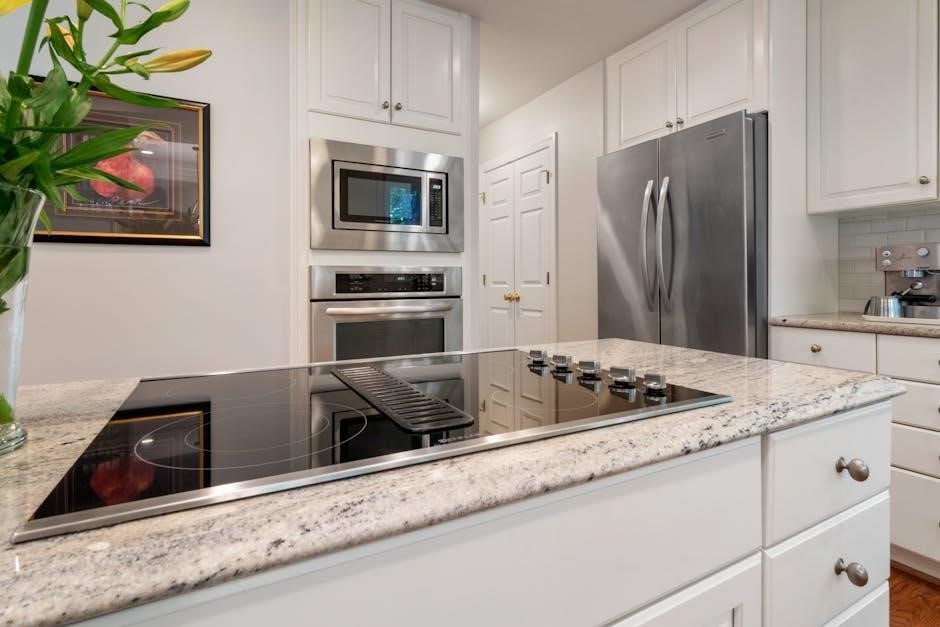
Key external features include the electronic oven control, automatic oven light switch, and the oven door lock latch. Inside, you’ll find the oven lights, temperature probe jack, and oven racks – with roll-out rack options available on select models. The CleanBake™ element is hidden beneath the floor panel, while the convection element and fan reside in the back panel.
The control panel houses both microwave and lower oven controls, along with the combination oven display. Familiarize yourself with the location of number keys, timer set/off, and start/cancel buttons for both oven and microwave functions. Understanding these locations will streamline your cooking experience.
Important Safety Instructions
Prior to operating your KitchenAid combination wall oven, carefully read the IMPORTANT SAFETY INSTRUCTIONS found in the owner’s manual. These instructions are designed to minimize the risk of fire, electric shock, and personal injury. This appliance should be properly installed and grounded.
Food safety is paramount: Do not allow cooked food to sit at room temperature for more than one hour, as this can lead to food poisoning or illness. Always ensure food reaches a safe internal temperature. Never use the oven for purposes other than intended cooking tasks.
Caution: The oven surfaces become hot during and after use. Avoid touching heating elements or interior surfaces while hot. Supervise children when the oven is in operation. Disconnect power before cleaning or performing maintenance. Refer to the manual for detailed safety guidelines and warnings.
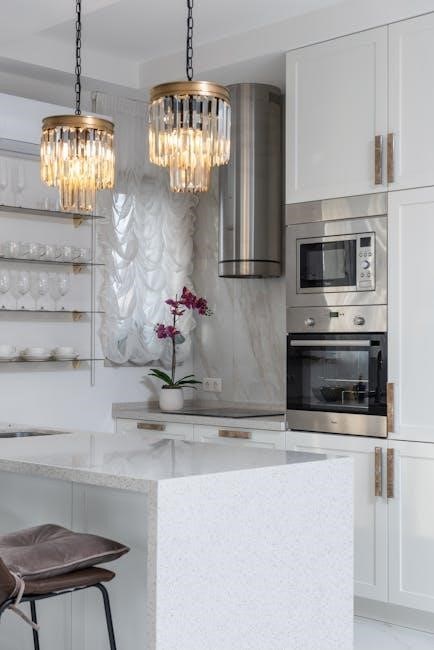
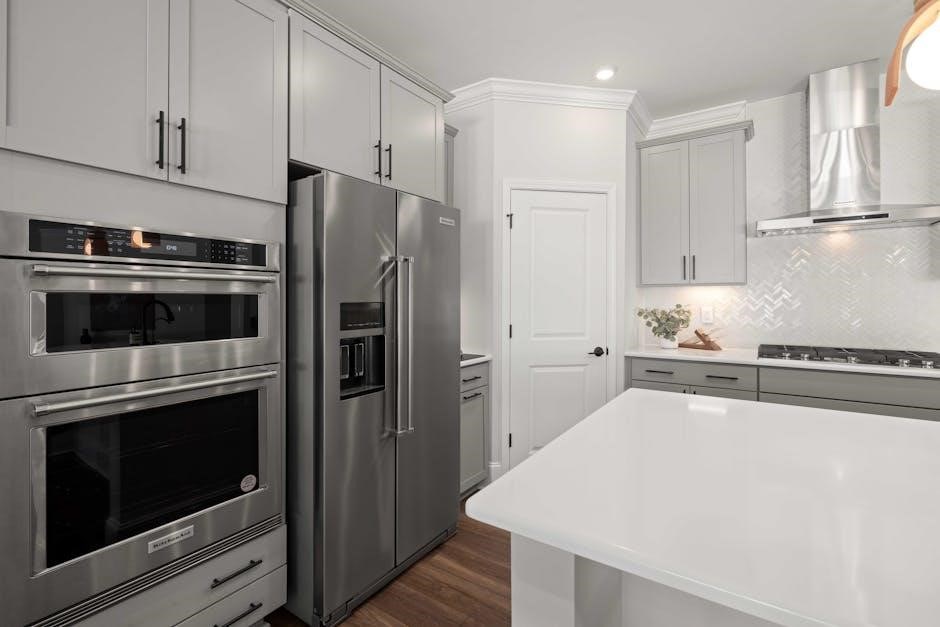
Oven Components ─ External
The exterior of your KitchenAid combination wall oven features several key components. The electronic oven control manages all oven functions. Locate the model and serial number plate on the bottom edge of the control panel’s right side – essential for service and warranty purposes.
You’ll also find the automatic oven light switch, controlling interior illumination. The oven door lock latch secures the door during operation, particularly during self-clean cycles. Note the oven lights themselves, providing visibility during cooking.
Select models include roll-out oven racks for easier access. The gasket seals the oven cavity, maintaining consistent temperatures. While not visible, the CleanBake™ element resides beneath the floor panel, and the convection element and fan are located in the back panel.
Electronic Oven Control Panel Overview
The electronic oven control panel is your central hub for operating both the upper and lower oven cavities. It features number keys for precise temperature and time input. The Timer Set/Off function allows for delayed start or automatic shut-off. Control the turntable on/off setting for microwave functionality.
Separate Start/Cancel buttons are dedicated to both the oven and microwave, ensuring correct operation. Access the Self-Clean cycle for convenient oven maintenance. Navigate the Clock/Tools menu to adjust settings and access additional features. Utilize the Cook Time and Stop Time settings for flexible cooking schedules.
EasyConvect™ controls simplify convection cooking, while the temperature probe jack accommodates precise internal temperature monitoring. The display clearly shows settings for both the upper and lower cavities, providing comprehensive control.
Model and Serial Number Plate Location
Locating your KitchenAid combination wall oven’s model and serial number plate is crucial for service, warranty claims, and ordering replacement parts. This plate contains vital information for identifying your specific oven model.
According to the control guide, the model and serial number plate is situated on the bottom edge of the electronic oven control panel. Specifically, it’s positioned on the right-hand side of the control panel. This location is easily accessible for quick reference without needing to move the appliance.
Carefully record this information in a safe place, such as your owner’s manual or a dedicated appliance record book. Having these numbers readily available will streamline any future interactions with KitchenAid customer support or authorized service technicians. Always reference these numbers when requesting assistance.
Oven Door and Locking Mechanism
The KitchenAid combination wall oven door is designed for smooth operation and safety. Understanding its features, including the locking mechanism, is essential for proper use and maintenance. The oven door utilizes a latch system for secure closure during operation.
According to the control guide, the oven door lock latch is located on the control panel area. This latch prevents accidental opening during baking, broiling, or self-cleaning cycles. Always ensure the door is fully closed and latched before initiating any cooking function, especially self-clean.
Do not force the door open while the oven is in operation or during the cooling phase. The locking mechanism may engage automatically for safety. If you encounter difficulty opening the door, allow the oven to cool completely before attempting to release the latch. Regular cleaning around the door seal (gasket) will ensure a proper seal and efficient operation.
Internal Oven Features
The interior of your KitchenAid combination wall oven is equipped with several key features designed to enhance cooking performance and convenience. These include the CleanBake™ element, hidden beneath the oven floor, which provides even heating and simplifies cleaning by eliminating exposed bake elements.
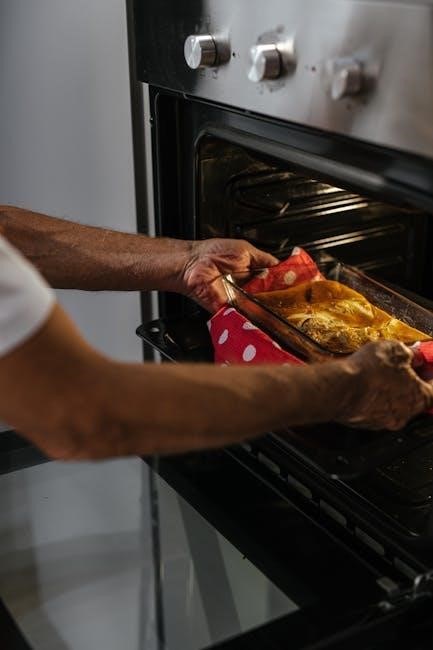
A convection element and fan, located in the back panel, circulate hot air for faster and more uniform cooking, ideal for baking and roasting. Oven racks, available in standard and roll-out options on select models, provide versatile placement for various dishes. The oven lights illuminate the interior, allowing for easy monitoring of cooking progress.
The temperature probe jack allows for precise temperature control when cooking meats and poultry. A gasket around the door ensures a tight seal, maintaining consistent temperatures. Remember to consult your model’s specific documentation for details on feature availability and placement.
CleanBake™ Element and its Function
The CleanBake™ element is a revolutionary feature designed to simplify oven cleaning in your KitchenAid combination wall oven. Unlike traditional exposed bake elements, the CleanBake™ element is hidden beneath the oven floor, creating a smooth, sealed surface.
This innovative design prevents food spills from baking onto the element, eliminating the need for tedious scrubbing. When activated, the CleanBake™ element heats up, effectively burning off food residue during the self-clean cycle. This results in a significantly cleaner oven interior and reduces the effort required for maintenance.
The smooth surface also contributes to more even heat distribution, enhancing cooking performance. It’s a key component in KitchenAid’s commitment to providing convenient and efficient cooking solutions. Refer to the self-clean cycle operation section for detailed instructions on utilizing this feature.
Convection Element and Fan Details
The convection element and fan are crucial components for achieving exceptional baking and roasting results in your KitchenAid combination wall oven. Located in the back panel of the oven cavity, the convection element works in tandem with the fan to circulate hot air evenly throughout the oven interior.
This consistent heat distribution eliminates hot and cold spots, ensuring food cooks uniformly on all sides. Convection cooking is particularly beneficial for baking multiple racks of cookies, roasting large cuts of meat, or achieving a crispy exterior on casseroles.
The fan’s speed is automatically controlled to optimize airflow for various cooking modes. Utilizing the EasyConvect™ controls allows you to easily select convection settings for specific recipes. Proper functioning of the convection system ensures faster cooking times and superior results.
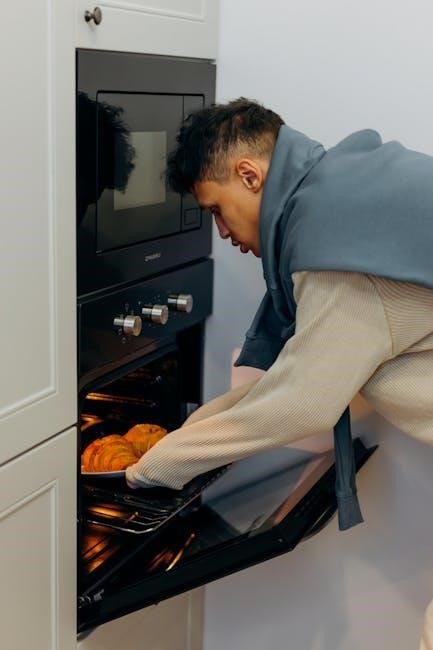
Oven Racks – Standard and Roll-Out Options
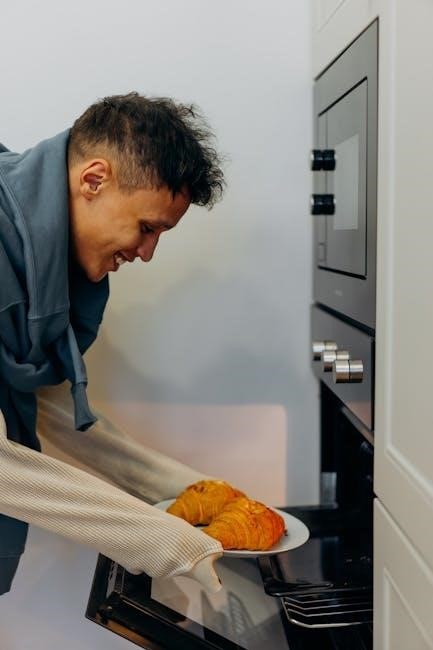
Your KitchenAid combination wall oven is equipped with oven racks designed to accommodate various cookware and baking needs. Standard oven racks slide into designated rack positions within the oven cavity, providing a stable surface for cooking. However, select KitchenAid models feature convenient roll-out oven racks, enhancing accessibility and safety.
Roll-out racks extend fully outside the oven when opened, allowing you to easily check on food or add/remove items without reaching into a hot oven. This feature minimizes the risk of burns and simplifies the cooking process. Always ensure the racks are properly seated in their tracks before loading with cookware.
To remove or install racks, gently pull them forward and lift. Refer to your model’s specific instructions for detailed guidance. Proper rack placement is essential for optimal airflow and even cooking.
Combination Oven Display – Upper and Lower Cavities
The KitchenAid combination wall oven features a sophisticated display designed to manage both the upper and lower oven cavities independently. The display clearly shows the settings for each cavity, including temperature, cooking mode, and remaining cook time. This dual-display functionality allows for simultaneous cooking at different temperatures or with different settings in each oven.
The upper oven cavity display typically shows the current mode (bake, broil, convection, etc.) and the set temperature. The lower oven cavity display mirrors this information, providing a dedicated view for the lower oven’s operation. Navigating between cavities is usually achieved through dedicated control buttons on the control panel.
The display also provides important feedback, such as preheat indicators and timer status. Familiarize yourself with the display’s icons and messages for efficient operation.
Microwave Controls – Separate Guide Reference
The microwave component of your KitchenAid combination oven operates with a dedicated set of controls, distinct from those governing the oven functions. Due to the complexity and breadth of microwave features – including power levels, sensor cooking, and pre-programmed settings – a separate Control Guide is provided specifically for the microwave portion of the appliance.
This separate guide (W11417273 ─ Rev A) details the operation of the microwave controls, including the number keys, timer functions, turntable on/off, and start/cancel buttons. It’s crucial to consult this guide for comprehensive instructions on utilizing the microwave’s capabilities effectively.
Referencing the dedicated microwave guide ensures you understand all available features and can safely and efficiently operate the microwave portion of your KitchenAid combination oven. You can find this guide online at kitchenaid.com or kitchenaid.ca.
Lower Oven Controls – Detailed Explanation
The lower oven’s control panel provides intuitive access to all baking and roasting functions. Key components include dedicated number keys for precise temperature and time input, alongside the Timer Set/Off button for managing cooking durations. The Turntable On/Off control (if applicable to your model) manages the rotation feature.
Separate Start/Cancel buttons are provided for both the oven and microwave, ensuring focused operation. The Oven Light button illuminates the interior for monitoring. Self-Clean activation is managed through a dedicated button, initiating the cleaning cycle.
The Clock/Tools menu offers access to settings like clock adjustment and specialized features; Cook Time and Stop Time settings allow for delayed start or automatic shut-off. EasyConvect™ controls simplify convection cooking, and the Temperature Probe jack facilitates precise internal temperature monitoring.
Number Keys and Their Usage
The number keys (0-9) on the lower oven control panel are central to setting temperatures, cook times, and stop times. When setting the oven temperature, input the desired degrees directly using the number keys, followed by confirming the selection. For cook time, enter the minutes and seconds using the numeric keypad, then press ‘Start’ to initiate the cooking process.
Stop time settings utilize the same input method – enter the desired time for the oven to automatically shut off. These keys also function in conjunction with other features, such as programming a delayed start time. Remember to double-check your inputs before confirming, as incorrect values will affect cooking results.
Precise control is achieved through these keys, allowing for customized cooking experiences. Refer to the manual for specific key combinations related to advanced features.
Timer Set/Off Functionality
The Timer Set/Off keys provide independent timing capabilities, separate from the oven’s cook functions. Pressing ‘Timer Set/Off’ initiates the timer setting process; use the number keys to input the desired duration in minutes and seconds. This timer can be used for various kitchen tasks, not exclusively oven-related, acting as a general-purpose countdown timer.
To deactivate the timer before it reaches zero, simply press ‘Timer Set/Off’ again. The display will revert to the oven’s current status. The timer function doesn’t automatically affect oven operation; it serves as a reminder only. It’s crucial to note that the timer is independent of the cook and stop time settings.
Audible alerts signal the timer’s completion. This feature is useful for monitoring multiple dishes simultaneously.
Turntable On/Off Control
The Turntable On/Off key manages the rotation of the glass turntable within the microwave cavity. When activated, the turntable rotates to ensure even cooking and heating of food items. This feature is particularly beneficial for dishes requiring uniform exposure to microwave energy, preventing hot and cold spots.
Deactivating the turntable is useful for larger, oddly shaped dishes that may not fit comfortably or rotate freely on the turntable. However, be aware that disabling the turntable may result in uneven cooking. It’s recommended to monitor food closely when the turntable is switched off.
The control panel clearly indicates the turntable’s current status – whether it’s rotating or stationary. Remember to re-enable the turntable for standard microwave operation. This control is exclusively for the microwave portion of the combination oven.
Start/Cancel Buttons – Oven and Microwave
Distinct Start/Cancel buttons are provided for both the oven and microwave functions of your KitchenAid combination appliance. These buttons are crucial for initiating and terminating cooking or heating cycles. The microwave features a dedicated “Microwave Start/Cancel” button, while the oven utilizes a separate “Lower Oven Start/Cancel” button.
Pressing the Start button initiates the selected cooking program, activating the corresponding heating element or microwave power level. The display will confirm the start of the cycle. To halt an active cycle at any time, simply press the appropriate “Cancel” button.
The Cancel function immediately stops the operation, returning the appliance to standby mode. Be mindful that canceling a cycle mid-operation may affect the final result. Always ensure the buttons are used correctly to avoid unintended operation;
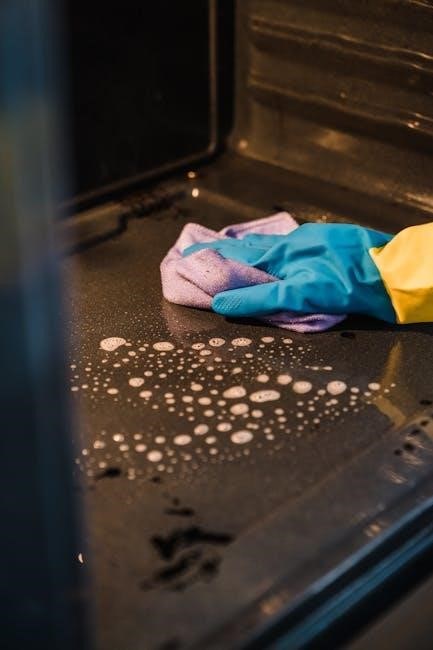
Self-Clean Cycle Operation
The Self-Clean cycle utilizes extremely high temperatures to burn off food residue within the oven cavity, eliminating the need for manual scrubbing. Before initiating, remove oven racks, cookware, and any loose debris. Ensure the oven door is fully closed and latched – it will automatically lock during the cycle for safety.
Access the Self-Clean function through the “Self-clean” option on the control panel. You can typically select a cleaning duration, ranging from a standard cycle to a heavy-duty option for stubborn soils. The cycle duration varies depending on the selected setting.
During operation, the oven will become very hot, and a slight odor may be present – this is normal. Once complete, the oven will cool, and the door will unlock automatically. Allow sufficient cooling time before removing any items. Caution: Never interrupt a self-clean cycle manually.
Clock/Tools Menu Navigation
Accessing the Clock/Tools menu allows customization of oven settings beyond basic cooking functions. Typically, you’ll press the “Clock/Tools” button on the control panel to enter this section. Within this menu, you can adjust the current time, set a delayed start time, and configure various oven preferences.
Common options include setting the clock display format (12-hour or 24-hour), enabling or disabling audible alerts, and adjusting the oven temperature calibration. Some models may also offer a “Sabbath Mode” for specific religious observances. Navigation is usually achieved using the number keys and arrow buttons.
Explore the menu carefully to familiarize yourself with all available options. Refer to the full owner’s manual for detailed explanations of each setting. Remember to save any changes made before exiting the Clock/Tools menu to ensure they are applied.
Cook Time and Stop Time Settings
Utilizing Cook Time allows the oven to automatically shut off after a specified duration, preventing overcooking. Enter the desired cooking time using the number keys, then press “Cook Time” to activate. The oven will begin counting down, and automatically turn off when the time elapses.
Stop Time functionality, conversely, lets you set a future time when you want the oven to turn off. Input your desired stop time, press “Stop Time,” and the oven will calculate and begin cooking to reach that endpoint. This is useful for meal preparation with delayed completion.
Combining both settings provides maximum control. You can set both a cook time and a stop time, ensuring the oven doesn’t exceed a certain duration while still completing the cooking process at a specific time. Always double-check your inputs before starting!
EasyConvect™ Controls – Utilizing Convection Features
EasyConvect™ simplifies convection cooking by automatically adjusting cooking times and temperatures for optimal results. When selecting this mode, the oven intelligently adapts settings, eliminating the need for manual conversions from traditional recipes.
To activate EasyConvect™, simply press the designated “EasyConvect™” control on the oven panel; The display will indicate convection operation. This feature is ideal for baking, roasting, and even toasting, delivering consistent and evenly cooked food.
Benefits include faster cooking times, reduced energy consumption, and enhanced browning. For best results, ensure food is placed on a single rack. Refer to the control guide for specific EasyConvect™ settings and recommended adjustments for various dishes. Experiment to discover the full potential of this convenient feature!
Temperature Probe Usage and Jack Location
The temperature probe allows for precise cooking by monitoring the internal temperature of your food. This ensures dishes are cooked to perfection, eliminating guesswork and preventing over or undercooking. It’s particularly useful for larger cuts of meat, poultry, and roasts.
Locating the jack: The temperature probe jack is situated within the oven cavity, typically on the side wall. Insert the probe connector firmly into the jack. Ensure the probe wire is positioned to avoid contact with heating elements or the oven door during operation.
Using the probe: Insert the probe into the thickest part of the food, avoiding bone. Set the desired internal temperature using the oven controls. The oven will automatically shut off when the target temperature is reached. Caution: The probe and connector become hot during cooking – use oven mitts when handling.
Food Safety Considerations – Preventing Food Poisoning
Maintaining food safety is paramount when using your KitchenAid combination oven. Bacteria grow rapidly at temperatures between 40°F and 140°F (4°C and 60°C), increasing the risk of foodborne illness. Proper cooking and timely handling are crucial.
Critical timing: Do not allow cooked food to sit at room temperature for more than one hour, especially during warmer months. Promptly refrigerate leftovers in shallow containers to facilitate rapid cooling. Thoroughly reheat leftovers to an internal temperature of 165°F (74°C).
Safe cooking temperatures: Utilize the temperature probe for accurate internal temperature monitoring. Ensure poultry reaches 165°F (74°C), ground meats 160°F (71°C), and roasts/steaks reach the desired level of doneness. Always practice safe food handling techniques to prevent cross-contamination.